Installing Softerhaze’s Milk Thistle lighting Mod for Sims 4 on a Mac

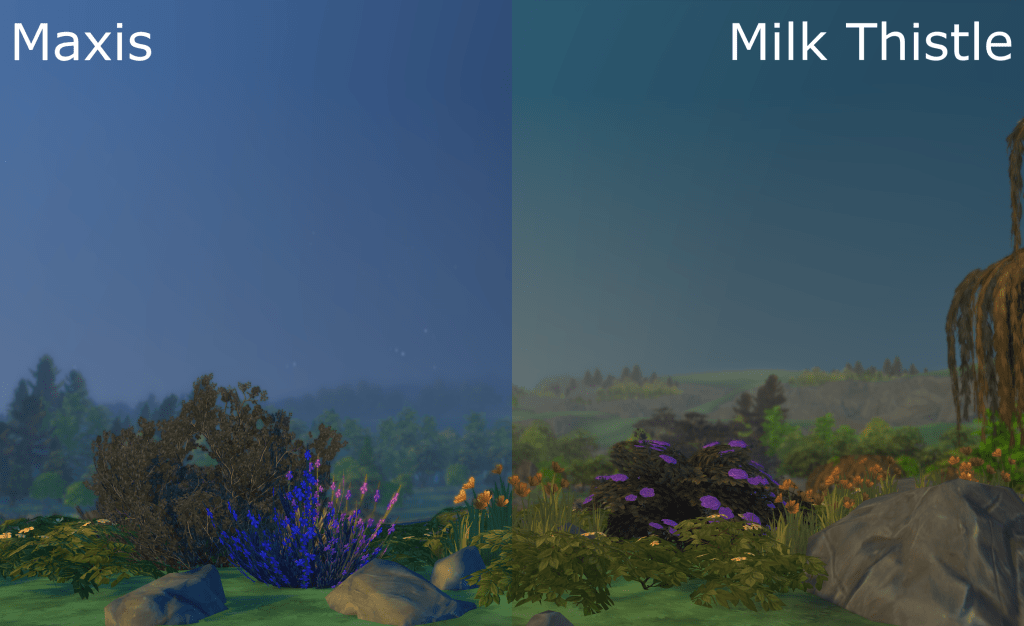
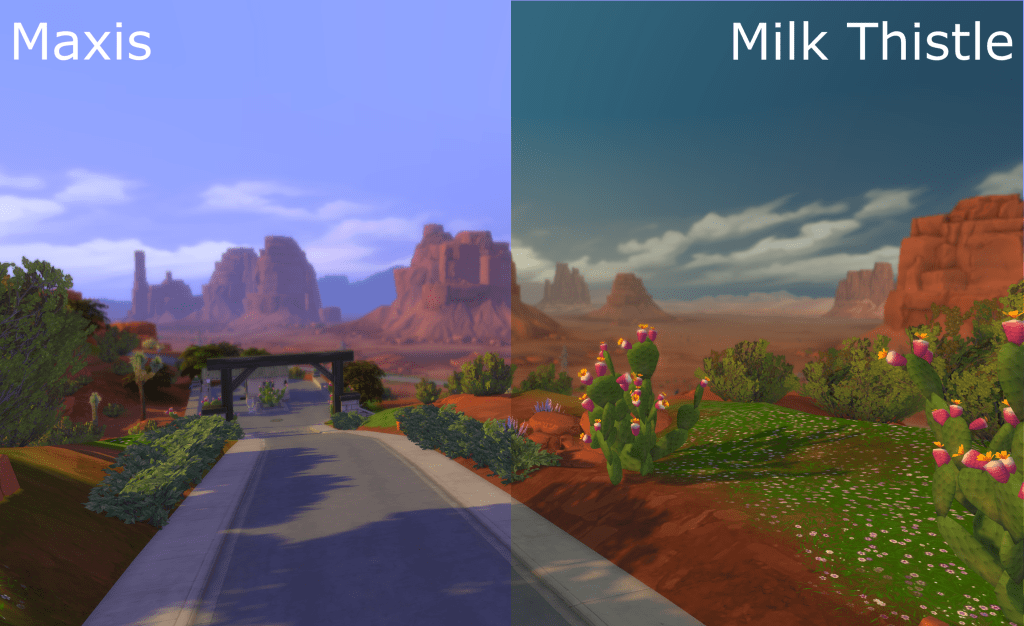
I’ve been meaning to get round to installing this lighting mod for ages but noticed the installation instructions for Mac aren’t quite accurate and there is some confusion in the comments. It’s really quick and easy to install on a Mac. This Mod replaces existing Maxis default game installation world files with Softerhaze’s edited ones. Softerhaze’s guide is here and you should refer to it for the specific Pack numbers and other useful info.

This Mod is not installed in the Mods folder as most Mods are, it replaces actual game installation files. As is always the case with Mods, make sure the lighting Mod is compatible with the current patch version of the game and if it is not run a game repair to remove the modded files until they are updated.

Setting up your folders for installation

  • Download the lighting Mod from Softerhaze’s site here
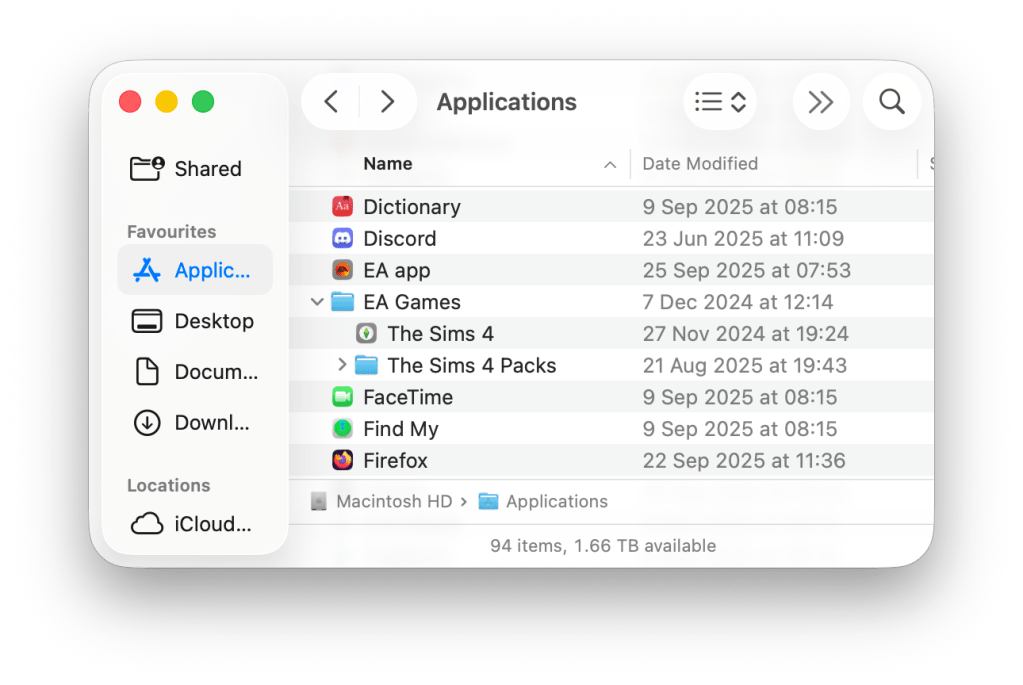
  • Locate your Sims 4 base game installation. By default this will be in Applications > EA Games. You can check the location in EA App > Settings > Download
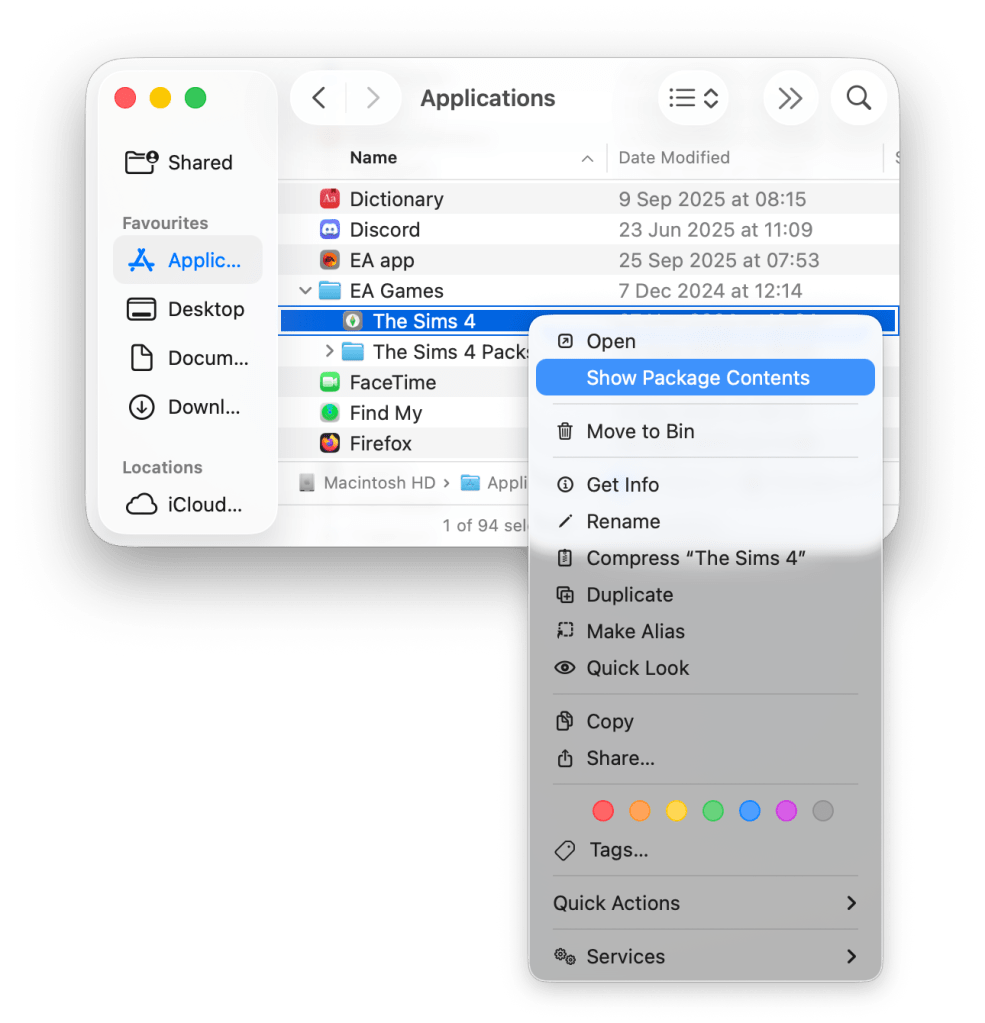
  • Right click on the base game app and select Show Package Contents. Right click is secondary click in System Settings > Trackpad/Mouse. Or you can hold down the CTRL key and click once:
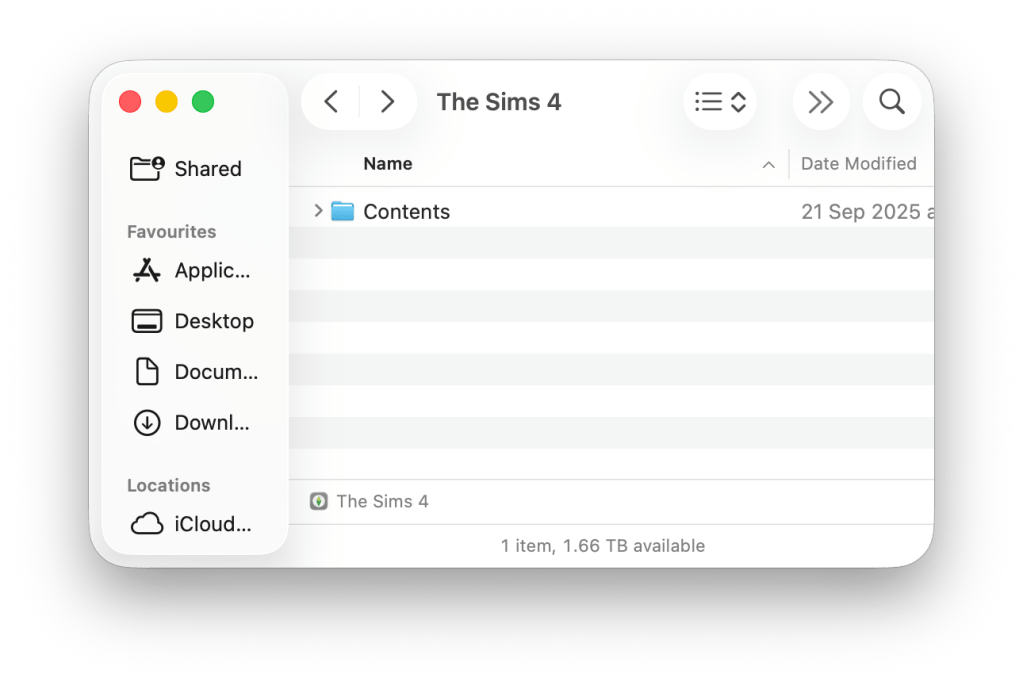
  • A Finder window will open and show the Contents folder:

Replacing Base Game world files

Before replacing the existing Maxis world files with the Modded files you may want to make backup copies of the existing files in case the modded files break a specific world, but not all worlds.

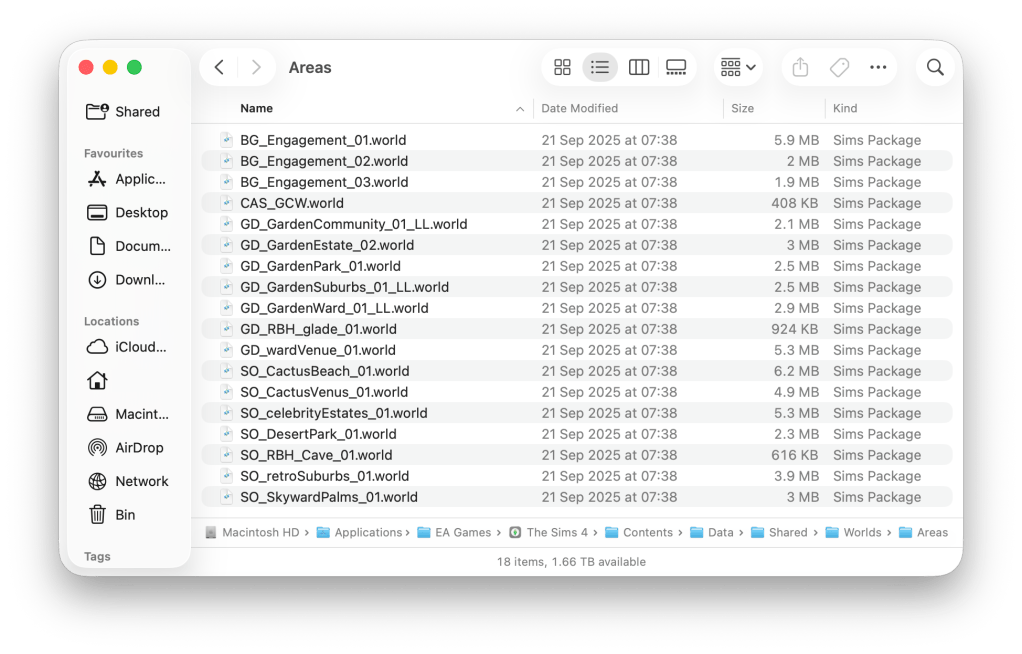
  • To replace the base game worlds navigate through to Contents > Data > Shared > Worlds > Area and you will see all the worlds:
  • If you want to make a backup copy of all these Maxis default files select them all Edit > Select All (CMD + A) and click on Edit > Copy (CMD + C) in the menu bar. Then navigate to where you would like to save the backed up copies and click on Edit > Paste (CMD + V).
  • Now open the Milk Thistle Mod you downloaded. It will be zipped. Double click to unzip and a folder will appear called milk-thistle with all the world files. Open the milk-thistle folder.
  • Open the Data folder and subsequent folders until you see all the individual base game worlds and areas:
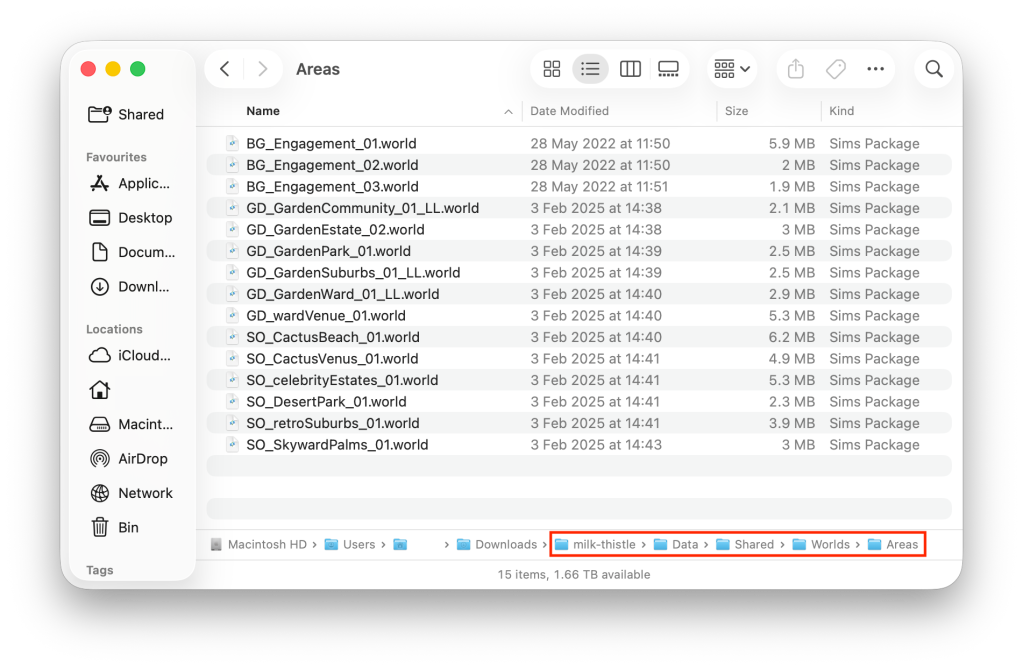
  • Now go back to the other Finder window you have open where you opened the world areas folder for the base game in the previous step. Make sure you have this Finder window next to the Milk Thistle one:
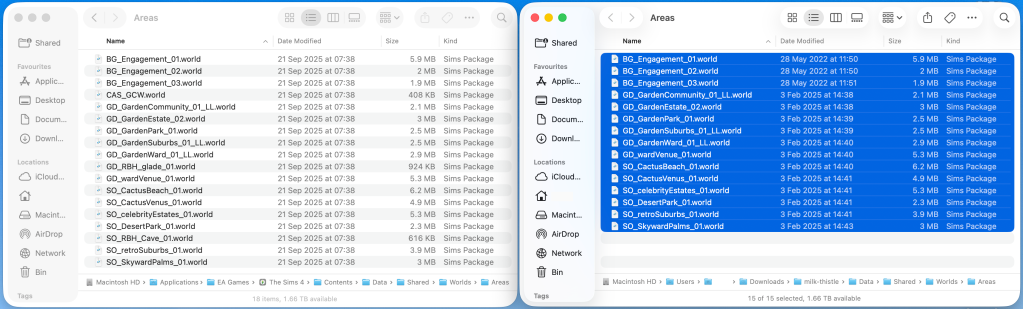
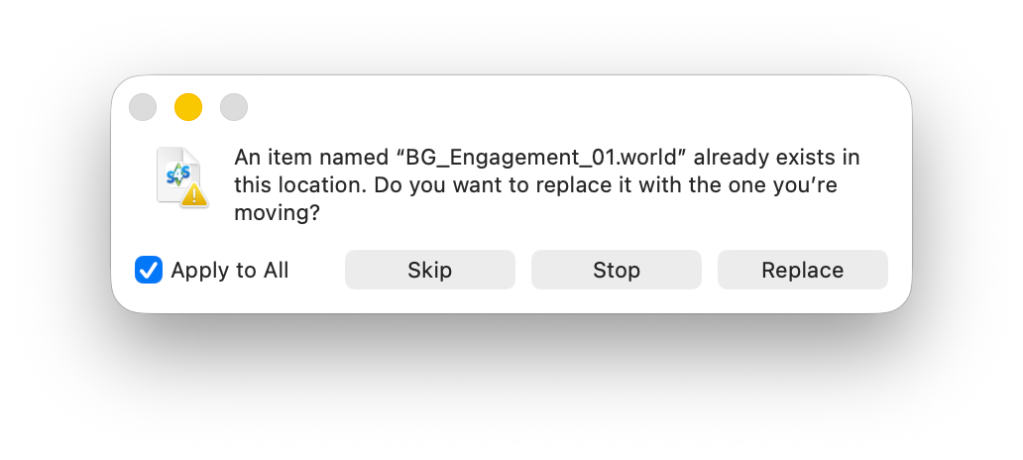
  • Select all the files in the Milk Thistle > Data > Shared > Worlds > Areas folder by clicking Edit > Select All (CMD + A) in the menu bar (in above screenshot). Now drag all those files over to the other Finder window you have open for the base game. When prompted to replace files make sure you check the box next to Apply to All then click Replace:
  • The base game installation files will now be replaced with the Milk Thistle ones.

Replacing world files in Game Packs and Expansion Packs (DLC)

Replacing world files that came with specific Game and Expansion Packs is a little more fiddly but still simple. Before replacing the existing Maxis world files with the Modded files you may want to make backup copies of the existing files in case the modded files break a specific world, but not all worlds.

  • After selecting Show Package Contents on the base game app navigate through to Contents > Delta. You will see separate folders for all the Packs.
  • Choose which Pack world files you want to edit using Softerhaze’s list here. I am going to install the edited files for Strangerville so I open the GP07 folder:
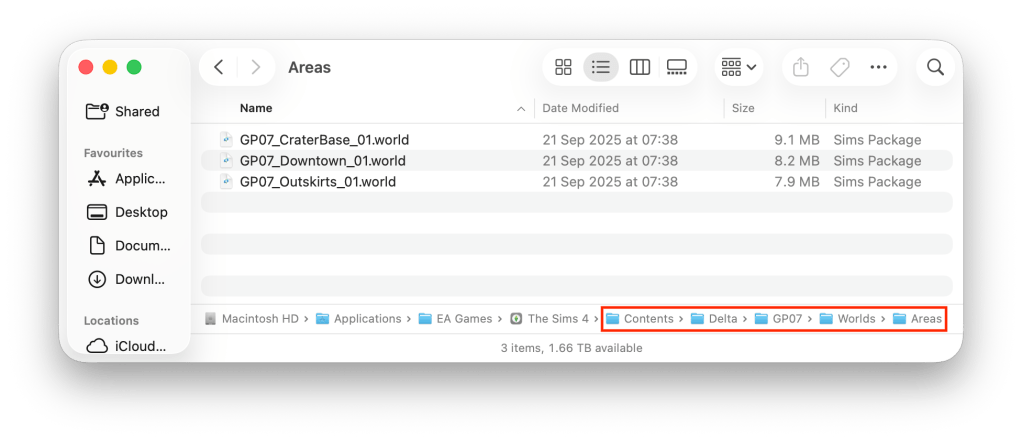
  • Now open the corresponding GP07 folder in the milk-thistle > Delta > GP07 > Worlds > Areas downloaded folder:
  • If you want to make a backup copy of all these Maxis default files select them all Edit > Select All (CMD + A) and click on Edit > Copy (CMD + C) in the menu bar. Then navigate to where you would like to save the backed up copies and click on Edit > Paste (CMD + V).
  • Same as we did for the base game Data files above, select all the files in the Milk Thistle > Delta > GP07 > Worlds > Areas folder and drag them over to the base game Finder window you have open:
  • Replace the files when prompted, as above
  • Repeat the above steps for all the Packs you want to edit the world files for

Reverting back to Maxis installed game files

If you want to go back to the vanilla lighting in-game simply run a game repair in EA App and this will replace the modded world files with the default Maxis ones. Please note this will repair the base game and ALL Packs world files.

If you have any questions or issues with installing the files, join my Discord server for further support – https://discord.gg/EB9hZBDx34

Improve the graphics in your Sims 4 game

I’ve recently discovered an amazing Simmer, Simp4Sims, who not only makes very cool stop motion build videos but has also provided an edited GraphicsRules.sgr file which will greatly enhance your in-game graphics. The GraphicsRules.sgr file is a game file that tells your game which graphics settings to load. It is nestled within the Sims4.app files but, since an update in September 2020, you can place a copy in the ConfigOverride folder in the Sims 4 folder and this will override the hidden original. Spot the difference:

It’s very easy to make this change to your game as Simp4Sims has done all the hard work for you by editing various values in the GraphicsRules.sgr file but it’s also important that your Mac has a GPU powerful enough to handle the increased demand. If you have a Mac with integrated Intel graphics only I would not recommend doing this as it will most likely slow your game to a crawl and possibly cause it to freeze. If you have a Mac with an AMD GPU with 4GB or more VRAM then go for it. You may also notice a hit on performance in-game but you should be able to play. I don’t spend much time in Live mode, for me it’s all about the aesthetic and my game still runs great after adding this file.

After testing I can confirm this will reintroduce swimming pool reflections, something Maxis removed from the default file. It also improves the shadow lines and artifacting issues.

Instructions:

  1. Head over to Simp4Sims Patreon page here and download the GraphicsRules.sgr file. Don’t worry, you don’t need to be a Patron, the download is freely available to all. He also helpfully explains the main changes that have been made to the file.
  2. Navigate to your Sims 4 folder (where all your saves, Mods, Tray and other user data is saved) and open the ConfigOverride folder.
  3. Open the Downloads folder in a new Finder window, grab and drag the GraphicsRules.sgr file you just downloaded and drop it into the ConfigOverride folder.

and that’s it! It really is that easy. If you decide to go back to the original GraphicsRules.sgr file just trash the one in the ConfigOverride folder and your game will revert back to using the hidden file in the Sims4.app.

If you like to play a vanilla game don’t let this put you off, this is NOT a Mod. It is an edited game file that you can easily make changes to yourself if you prefer. We used to have to edit the GraphicsRules.sgr and GraphicsCards.sgr files in Sims 3 all the time just to get the game to work. You can find more information on the ConfigOverride folder here.

What is the ConfigOverride folder? Editing Sims 4 graphics files the easy way

The September 2020 patch 1.66.139.1220 has introduced an easier way to edit the Sims 4 graphics files. This is helpful if you have a newer machine with a GPU that isn’t yet supported in the game. Or you want to edit the files to override the in-game settings.

There is now a folder called ConfigOverride in the Sims 4 user data folder where your saves etc. are stored. You can place copies of the GraphicsCards.sgr, GraphicsRules.sgr and Default.ini files in here and any changes you make to the copies will override the existing game files in The Sims 4.app > Contents > Resources. If you have issues with the files you have edited, you simply trash them and the game will default back to the master game files in the Sims 4 app. You can then repeat the copy/paste to add them to the ConfigOverride folder and edit away. Repairing the game will replace the master files in the Resources folder.

Windows users – head over to Crin’s site for your instructions.

To make the file copies for editing:

  1. Right click on the Sims 4 app and select Show Package Contents (Windows users: \The Sims 4\Game\Bin and skip step 2)
  2. Navigate through Contents > Resources
  3. Select the Default.ini, GraphicsCards.sgr and GraphicsRules.sgr files and hold down CMD and C to copy or go to File > Copy
  4. Open the ConfigOverride folder in your Sims 4 folder and paste the files into the folder, CMD and V or File > Paste
  5. DO NOT drag the files from one folder to the other, you must copy/paste them

These are not normally files that the average user has to bother with so if you’ve never had to edit the files before, chances are you won’t need to start now. However, for those who like to tinker around and potentially break things (like me), here’s a quick explanation for these files and what they do:

Default.ini – you can change the default plumbob colours for your sim in here

GraphicsCards.sgr – the database for all supported and some older unsupported graphics cards (GPUs) in the game. If you receive the warning that your video card is not supported when you load the game, this is where you add it. You can also raise the default setting for your GPU if you think it is too low.

GraphicsRules.sgr – this tells the game what to do with the in-game graphics options when you chose Low/Medium/High/Ultra. There are settings for each which you can change. Simp4Sims has made an edited version of this available to download for free here which will really make your game look beautiful.